Lab Sustainability Doesn’t Have To Be Painful

Ian Nicastro says he didn’t set out to start a green revolution.

“I’m not hardcore ‘Save the trees,’” Ian says. “I’m probably a little different from the people you traditionally see as promoting the sustainability thing. Obviously, I do want to help the environment, but for me it was like, ‘this is logical, and we should be doing this.’”

Ian is the lab manager of the Pasquinelli Lab, a C. elegans lab at the University of California–San Diego that studies miRNA and its role in processes like aging. He’s been in the lab for about six and a half years, splitting his time between research and lab management duties. According to Allison Paradise, the CEO of My Green Lab, Ian has put out some “outstanding” efforts to implement sustainable practices in the lab. Continue reading “Lab Sustainability Doesn’t Have To Be Painful”

Dual-Luciferase or Dual-Glo Luciferase Assay System? Which one should I choose for my reporter assays?

Confused woman

I’ve got a set of experiments planned that, if all goes well, will provide me with the answer I have been seeking for months. Plus, my supervisor is eagerly awaiting the results because she needs the data for a grant application, so I don’t want to mess it up. However, I am faced with a choice for my firefly and Renilla luciferase reporter assays: Do I use the Dual-Luciferase® Reporter Assay System or Dual-Glo® Luciferase Assay System? What’s the difference? How do I decide which to use? I’m so confused! Help!

Sound familiar? Not to worry! The choice is not difficult once you know how these assays work and how they differ.

Continue reading “Dual-Luciferase or Dual-Glo Luciferase Assay System? Which one should I choose for my reporter assays?”

Cloning Modified Blunt-ended DNA Fragments into T-Vectors

Tailing blunt-ended DNA fragments with TaqDNA Polymerase allows efficient cloning of these fragments into T-Vectors such as the pGEM®-T Vectors. This method also eliminates some of the requirements of conventional blunt-end cloning — Fewer steps, who can argue with that?

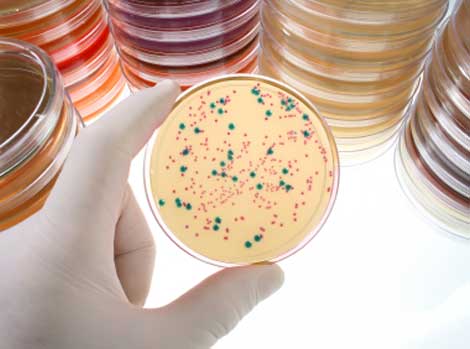
Blue/White colony screening helps you pick only the colonies that have your insert.

Continue reading “Cloning Modified Blunt-ended DNA Fragments into T-Vectors”

A BiT or BRET, Which is Better?

Now that Promega is expanding its offerings of options for examining live-cell protein interactions or quantitation at endogenous protein expression levels, we in Technical Services are getting the question about which option is better. The answer is, as with many assays… it depends! First let’s talk about what are the NanoBiT and NanoBRET technologies, and then we will provide some similarities and differences to help you choose the assay that best suits your individual needs.

Continue reading “A BiT or BRET, Which is Better?”

Executing a NanoBRET™ Experiment: From Start to Data

This is a guest post from Katarzyna Dubiel, marketing intern in Cellular Analysis and Proteomics.

“The objective of my experiment was to test the NanoBRET™ assay as if I was a customer, independent of the research and development team which develops the assay.”

Designing and implementing a new assay can be a challenging process with many unexpected troubleshooting steps. We wanted to know what major snags a scientist new to the NanoBRET™ Assay would encounter. To determine this, we reached out to Laurence Delauriere, a senior applications scientist at Promega-France, who had never previously performed a NanoBRET™ assay. Laurence went step-by-step through the experimental process looking at the CRAF-BRAF interaction in multiple cell lines. In an interview, Laurence provided us with some tips and insights from her work implementing the new NanoBRET™ assay.

In a few words, can you explain NanoBRET?
“NanoBRET is used to monitor protein: protein interactions in live cells. It is a bioluminescence resonance energy transfer (BRET) based assay that uses NanoLuc® luciferase as the BRET energy donor and HaloTag® protein labeled with the HaloTag® NanoBRET™ 618 fluorescent ligand as the energy acceptor to measure the interaction of two binding partners.” Continue reading “Executing a NanoBRET™ Experiment: From Start to Data”

Control Samples: 3 Terrifying Tales for Scientists

Lab science cartoon
Carl may not scare her…but did she remember the controls?

Warning: This blog contains stories about phantom serial killers, frankenfoods, mysteriously phosphorylated bands and unrequited ligations that may be disturbing to some people. Children or scientists prone to anxiety over irreproducible results should read this with their eyes shut.

I

Clouds hung low in the sky, and the late October wind howled between the buildings, rattling the window panes of the basement laboratory. The grackles cawed in desperate warning, their flocks changing the evening color palette from gray to black. I was as unsettled as the weather, watching my blot slosh back and forth.

Continue reading “Control Samples: 3 Terrifying Tales for Scientists”

A Crash Course in Fighting Lab Contamination

When I first started in my undergraduate lab, one of the first things I learned was how to prepare agar plates for growing yeast. My supervisor, a grad student, looked over my shoulder as I added the yeast extract, bacto peptone, and other ingredients. I sealed the pitcher tightly with aluminum foil and autoclaved it until sterile. When I was ready to pour the plates, I carried the pitcher to the “plate-pouring” room, ripped the foil off, and started to pour an even layer of agar into each of the plastic dishes, leaving the lids off so they could cool. After I’d poured a dozen or so, my grad student supervisor burst into the room.

“What are you doing?” she demanded.

“I’m pouring plates,” I stammered back.

She took a deep breath and explained. By fully uncovering the pitcher and leaving my plates uncovered, I had left my precious media at high risk for contamination. The open containers were far too inviting for potential contaminants floating through the air. In the end, we ended up throwing away several of the plates that had been exposed the longest.

Now, I don’t share this story to demonstrate how clueless when I first started in the research lab as an undergrad. We all have those “uh-oh” moments when we realize for the first time that something that seemed so obvious was, in fact, more complicated than we’d expected. However, that day I learned how easily I could sabotage my own work by unwittingly inviting contaminants into my experiments.

Whether you work with yeast, bacteria, mammalian cells or anything else in a molecular biology lab, preventing contamination is crucial to getting desired results. Fortunately, minimizing your risk can be incredibly easy.

Let’s start with your lab bench. Everyone has their own organization system, but if yours is “out-of-control chaos,” you might want to reevaluate. Benchtop clutter makes it difficult to thoroughly clean the bench as often as needed. All those bottles of solutions, empty tip boxes, and wrinkled protocol sheets harbor dust and other unwelcome particles that you want to keep away from your cultures and reactions.

Once your benchtop is tidy (or at least somewhat tidy), make sure you keep the surface as clean as possible. Immediately clean up any spills or drips that happen while you’re working. Wiping your workspace with a 10% bleach solution will sterilize it, and following that up with 70% ethanol will dry it quickly. This wash should be performed at least once a day. Ideally you should also regularly remove everything from your workspace and perform a deeper cleaning of your benchtop, as well as any shelves and containers in your area.

Now that your bench is in good shape, it’s time to gear up . You should always follow standard safety procedures (lab coat and goggles, closed-toe shoes, hair tied back), but above all, make sure you never forget your gloves. Gloves protect you from harmful chemicals, but they also protect your experiments from anything that could be on your hands. Skin can carry reagents, bacteria, and enzymes that are good for your body but bad for your experiments. Change your gloves regularly to prevent potential carryover of reagents or samples between containers. A good rule is, “When in doubt, change your gloves.”

Finally, to guard against airborne contaminants, do your best to keep everything covered when you aren’t immdiately using it. I learned this rule the hard way when several of my yeast plates developed fuzzy patches of mold several days after I poured them. Bacteria and other undesirables floating through the air can affect stock solutions, cultures, plates, tubes, and basically anything else you rely on. Keep your lids on and cover open containers to minimize air exposure to reduce the chances of nefarious particles finding their way in.

There’s no way to guarantee you’ll never experience some form of contamination in your lab, but smart practices can help reduce your risk. Develop an anti-contamination routine that meets your needs and make sure you stick to it every day in the lab.

Working with RNA doesn’t have to be a nightmare

We’re all familiar with the Central Dogma of Molecular Biology: DNA is transcribed into RNA, which is translated into proteins. It’s drilled into our heads from the early days of biology classes, and it’s surprisingly useful when we start exploring in our own research projects. For example, if you’re interested in gene expression, you’ll most likely be working with RNA, specifically mRNA. Messenger RNA (mRNA) is transcribed from DNA and is used by ribosomes as a “template” for a specific protein. The total mRNA in a cell represents all of the genes that are actively being transcribed. So, if you want to know whether or not a gene is being transcribed, RNA purification is a great place to start.

When preparing your RNA samples for a downstream assay, there are several roadblocks and pitfalls that could give you quite a headache. Let’s tackle two of the most common.

Continue reading “Working with RNA doesn’t have to be a nightmare”

How to Take Care of Your Pipettes

Last updated: 1/22/21

what not to do with your pipettes

Pipettes are such a routine part of everyday life in the lab that it can be easy to take them for granted.  Their accuracy is vital, and there are many things we can adopt as best practices for success. Here are a few tips (no pun intended) gathered from around the Web by Kim Steinhauser of the Promega Metrology Department–the group charged with keeping our pipettes and other lab equipment functional and accurate.

Continue reading “How to Take Care of Your Pipettes”

Will This Kit Work with My Sample Type?

Whether you are working with cells, tissues or blood—making sure you use the correct assay system is critical for success.

In Technical Services, we frequently answer questions about whether a kit will work with a particular type of sample. An easy way to find out if other researchers have already tested your sample type of interest is to search a citation database such as Pub Med for the name of the kit and your specific sample type. We also have a searchable peer-reviewed citations database on our web site for papers that specifically cite use of our products. And on many of our product pages, you can find a list of papers that cite use of those products. In Technical Services, we are happy to help you in this search and let you know if scientists here at Promega have tested a particular application or sample type. This information provides a good starting point to optimize your own experiments.

One common question is “can the Caspase-Glo® Assays be used with tissue homogenates?” While Promega has not tested the Caspase-Glo® Assays with tissue homogenates, scientists outside of Promega have used the assays with tissue homogenates with success. As with almost all of our kits, Resources are provided on the catalog page including a list of Citations. As an example, here is a link to the Citations for the Caspase-Glo® 3/7 Assay Systems. We also have an article highlighting a citation on detecting caspase activities in mouse liver. A variety of lysis buffers have been used to make tissue homogenates for this application. To avoid nonspecific protein degradation, it is useful to include a protease inhibitor cocktail in the lysis buffer. The use of protease inhibitors doesn’t usually affect our assay chemistries. Additionally, many commercially available protease inhibitor sets can be used that do not contain caspase inhibitors. It is important to consider the specificity of the kit being used and include proper controls to ensure that the luciferase reaction is performing as expected. For more information on citations and example protocols, feel free to contact us here at Technical Services and we can help get you started with your sample type.